Over The Hump Day
July 30, 2008 at 6:24 pm | Posted in Uncategorized | 5 CommentsYay! It’s Wednesday! Only two more early wakeups left this week.
Look at what I received from one of my suppliers today.

I work in Accounts Payable and I was able to get payment to him for 30 past due invoices that we had no record of ever receiving. Do ya think he was grateful, lol? They are beautiful, though hubby says that he should have bought me a car seein as how I got him a payment of over $385,000. I think I agree, but I’ll enjoy the flowers for now and won’t hold my breath on the car. I noticed that I captured my glass piece in this picture – the blue woven piece to the left of the bouquet. It’s woven strips of glass that I fused in my kiln a month or two ago. I love this piece!
I made some cold process soap over the weekend, now cut and curing in the dining room. Lime Sugar Supreme – smells glorious! I’ve been making my own soap for about 9 years now. The only time I bought soap was for the night before my knee surgery – they now tell you to wash with antibacterial soap.

And a little more progress on Sweet Treats. I have the third block almost done and will soon be starting on the fourth block – Ice Cream.

Been reading some too. Finished Dyer Consequences by Maggie Sefton and started The Tenth Gift by Jane Johnson which is very enjoyable – needleworkers will love it. Synopsis:
In an entertaining if uneven debut novel from a U.K. publishing executive, dual story lines feature spirited English heroines—a 17th-century country girl and a modern-day craft shop owner—both with a gift for embroidery. As a farewell gift from her married lover, Julia Lovat receives a book published in 1625 and filled with a variety of sewing patterns. Inside the manual, Julia discovers the words, scribbled in pencil over the pages, of Cat Ann Tregenna, a 19-year-old British servant kidnapped by Muslim raiders and taken to Morocco to be sold into slavery. En route, the pirate leader, Al-Andalusi, is wounded in a battle, and Cat and her needlepoint skills are called on to stitch up the man’s wounds, an encounter that leads to a tangled interfaith rivalry. As Julia struggles to shake off the dregs of her affair, she finds inspiration in Cat’s makeshift diary and travels to Morocco to track down proof that Cat really existed; in the process, she discovers a new life of her own.
Happy Stitching!
A Little Bit of Progress
July 26, 2008 at 6:15 pm | Posted in Uncategorized | 5 CommentsAll I have to say is that since I went back to work on Monday, I am really ticked about not having enough time to stitch!! I’ve been on the hubby’s back to make more moolah so I can quit. Wishful thinking is all I have to go on these days, lol, cause there’s very little chance of him making more than his regular yearly increases, which BTW as I’m sure we all know, don’t even cover the increase in gas and goods this year.
I did manage to put a few stitches into Sweet Treats this week and should finish this block before the end of the weekend. I also managed to finish reading “Back to Blossom Street” by Debbie Macomber and start “Dyer Consequences” by Maggie Sefton.
I am a sucker for Halloween designs, so yesterday I ordered Murky Manor by Glendon Place from Stitching Bits and Bobs, who is having a sale, BTW. I ordered everything to complete it including the Picture This Plus fabbie called Dawn, and the specialty fibers and beads. SB & B didn’t have one of the beads so I’ll have to pick them up elsewhere. I’d like to have Sweet Treats done in the next couple of weeks so that I can start Murky and get it framed by October 1st.
Dad stopped over today because the contractor was coming to give us the estimate for the addition which will be his room. The estimate was just a little over our budget, so we’re proceeding and I’m kind of excited to get it started. Construction should start within the next two weeks or so, therefore it will be going on while I’m recuperating from my knee surgery. Hope they don’t make too much noise, lol. The addition will be 14 X 18 and include a powder room. It will sit up next to the deck on the back of the house – in fact, they’ll be relocating the steps that go from the deck to the driveway. Dad will have a door that exits onto the deck, in addition to being able to enter the room from inside the house. I think he’s very lonely in his apartment and very much looking forward to moving in with us and our chaos. With his dog, we’ll have four animals running around. Two dogs total and two kitties.
Well, after cleaning, doing laundry, meeting with the contractor, making dinner, and doing the dishes, I need a rest, lol. I’m off to stitch!
Kreativ Blogger Award
July 23, 2008 at 6:58 pm | Posted in Uncategorized | 5 CommentsMy lovely new stitching friend, Veronica, has made me very happy by nominating me for a Kreativ Blogger Award. I just starting stitching and blogging again after a long hiatus and Veronica was one of the first stitchers to extend me her friendship and therefore she will always be special to me. We’re SALing on CCN’s Sweet Treats right now!
Here are the rules for this award:
1. The winner may put the logo on her blog.
2. Put a link to the person you got the award from.
3. Nominate 5 blogs.
4. Put links to the blogs.
5. Leave a message for your nominees
Now my nominees – they have all inspired me:
1. Nicole of Carolina Dreams – her stitching is exquisite!
2. Susan of Afford Your Passions – she may not know it but I’ve read her blog for a long time!
3. Anne of Feather Stitching – we were blogging friends before my hiatus. I know she forgives me, lol, for abandoning cross stitch for a year!
4. Vonna, The Twisted Stitcher, whose finishing is incredible!
5. Milly of Stitching Obsession II, the wonderful moderator of the CCN/LHN yahoo group.
Carol
Progress is Being Made
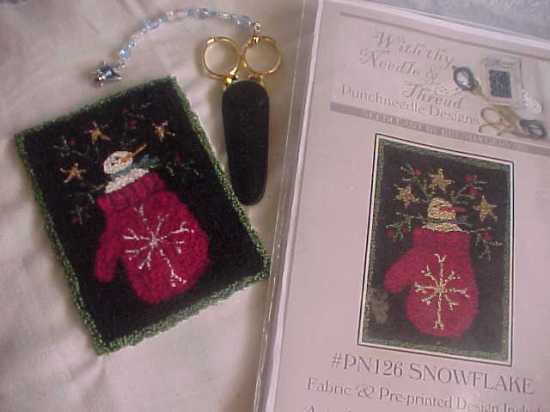
July 22, 2008 at 6:31 pm | Posted in Uncategorized | 4 CommentsEven though I started back to work yesterday since my medical leave is over, I made some stitching progress last night. Not as much as I’m used to getting, but progresss nonetheless. I believe stitching may have saved me since work, especially after being off for 2 1/2 months, did not go well. Seems like things have gotten even worse since I left which is hard to believe. Anyhow, here’s my lifesaver – Sweet Treats along with a new Craft Needle Separator that arrived today. Her little bead, the one attached to her wing, was broken, but since I definitely DO NOT have a shortage of beads, I put her to rights ASAP.
Excuse the little bit of glare on the angel – it’s dusky here and I had to use the Ott light .
I’m discombobulated from being back to work. Not only is the atmosphere there awful, but the work is stressful, and I’m just out of the routine I established when I was off. I feel the stress at work and then the stress at home to accomplish those things that I could just take my time doing. In addition, getting up at 5:30 is not as nice as rolling out of bed at 9:30, lol. Next surgery is August 20th and I’m looking forward to getting rid of this knee pain and being off for a little stretch again.
Been doing a little reading. “Back on Blossom Street” by Debbie Macomber which is the third installment in a set of books about a woman (cancer survivor) who opens a yarn store on Blossom Street. Not heavy reading by any means, but light and happy which is what I’m in the mood for. A friend at work noticed the book on my desk and mentioned that she’s reading “The Historian” by Elizabeth Kostova which she’s loving. From Amazon.com:
If your pulse flutters at the thought of castle ruins and descents into crypts by moonlight, you will savor every creepy page of Elizabeth Kostova’s long but beautifully structured thriller The Historian. The story opens in Amsterdam in 1972, when a teenage girl discovers a medieval book and a cache of yellowed letters in her diplomat father’s library. The pages of the book are empty except for a woodcut of a dragon. The letters are addressed to: “My dear and unfortunate successor.” When the girl confronts her father, he reluctantly confesses an unsettling story: his involvement, twenty years earlier, in a search for his graduate school mentor, who disappeared from his office only moments after confiding to Paul his certainty that Dracula–Vlad the Impaler, an inventively cruel ruler of Wallachia in the mid-15th century–was still alive. The story turns out to concern our narrator directly because Paul’s collaborator in the search was a fellow student named Helen Rossi (the unacknowledged daughter of his mentor) and our narrator’s long-dead mother, about whom she knows almost nothing. And then her father, leaving just a note, disappears also.
Right up my alley. I checked out the library online but they didn’t have the book, only the audio, so I checked ebay and got a copy for $5.50 shipping included! Just what I need for when I’m recuperating from the August surgery.
Happy Stitching!
Carol
No More Tangles
July 18, 2008 at 12:15 pm | Posted in Uncategorized | 3 CommentsNo, I’m not talking about hair conditioner. I’m talking about a new product made by Puffin & Co. It’s called a Craft Strand Separator and is my new favorite toy. I just received it in the mail today and it works like a charm.
An Ending Followed by A Beginning
July 16, 2008 at 9:19 pm | Posted in Uncategorized | 5 CommentsNow that’s a little bass-ackwards now, isn’t it, lol? Here’s the ending:
And here’s a beginning:
And here’s my interested audience:
I’m off to the ortho doc tomorrow morning and the evil man will probably send me back to work on Monday. My two month vacation recuperation comes to an end, however my other knee surgery is already scheduled for August 20th so my next vacation recuperation period starts then.
The contractor for the addition was here with the plans and the plumber. No estimate yet, however the two feet I added onto the length will definitely not make it cheaper.
Back to (hopefully) a decent movie and some stitching after a nice long shower. Guess I’ll have to shave my legs since the doc will be looking at my knees tomorrow, huh? Of course, I could just wear shorts and knee socks and just shave my knees.
Carol
Three Bags Full
July 15, 2008 at 5:18 pm | Posted in Uncategorized | 1 CommentThree bags full – that’s just about how much wool I have leftover from my rug hooking days. I could give Weeks Dye Works wool a run for their money, lol.
Noooo, I’m not taking rug hooking back up again, lol. This is what motivated me to get it out.
I finished this and as I’m sitting pondering what I’m going to do with it, I realize that it’s the perfect size for the front of a scissor pocket. My initial intention was to use it as a focal point on a pillow, but I like the scissor pocket idea better. BTW, I’ve never made a scissor pocket but they don’t look too hard. Vonna, you got a tutorial for one, lol??
Now you’d think with all this wool, that I would have lots of choices, right? No such luck. I managed to find this one piece of wool (just one) in the perfect shade of red. Now to find that tutorial!!!
Framing Tutorial – Pin Method
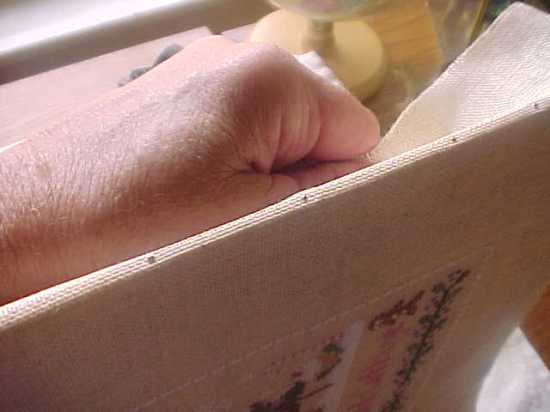
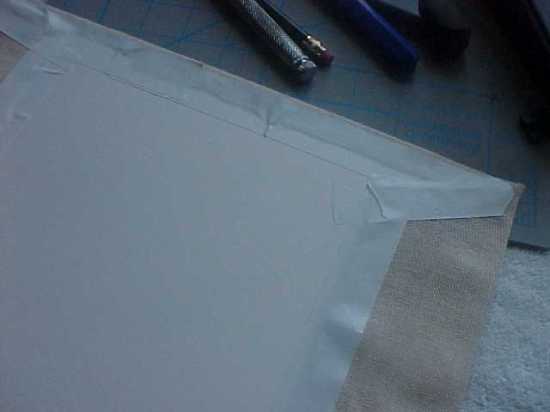
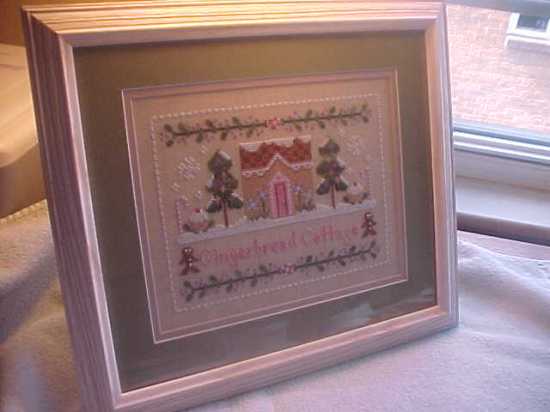
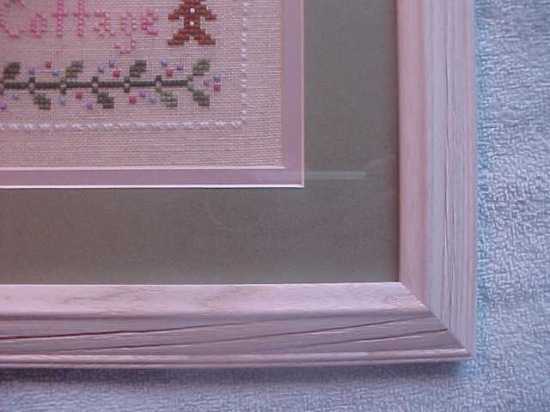
July 14, 2008 at 5:29 pm | Posted in cross stitch | 14 CommentsAs promised, I framed my Gingerbread Cottage today and took pictures of the process to perhaps aid those interested in doing their own framing. This method utilizes the pinning method as opposed to the lacing method.
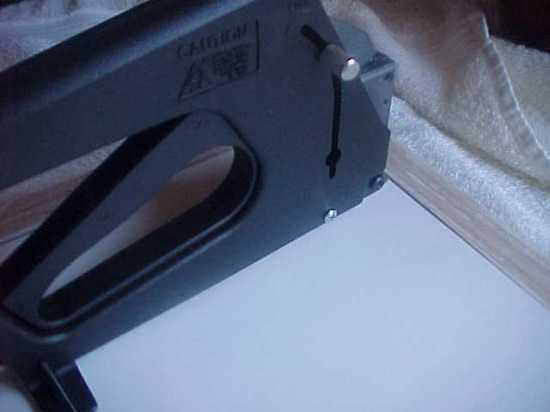
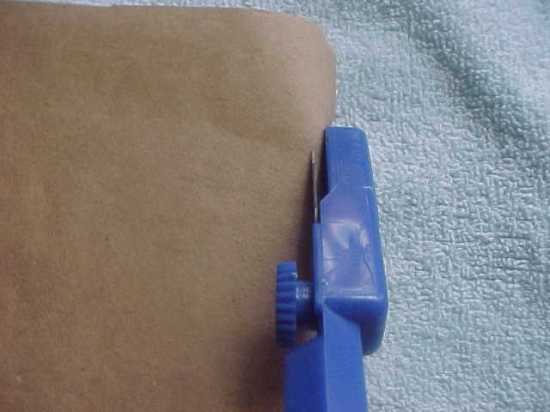
Doing your own framing is not difficult, nor very expensive. The most expensive tool required is a Point Driver which runs about $75.00 and is pictured below on the far right. Mine is made by Fletcher and is called the Fleximaster. You will require acid free foamcore which comes in two thicknesses – single and double. The double thickness is about 3/16″ thick. Single thickness is 1/8″ in thickness. Foamcore board is as the name implies – a thin core of foam sided with thin matboard like material. The thickness of the foamcore that you use is dependent on the width of the rabbet on your selected frame. The rabbet is the depth of the frame that you plop everything into – your glass, mats, pinned needlework on foamcore, and scrap matboard backing.
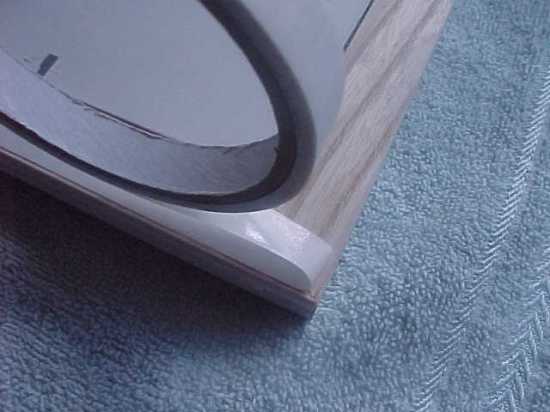
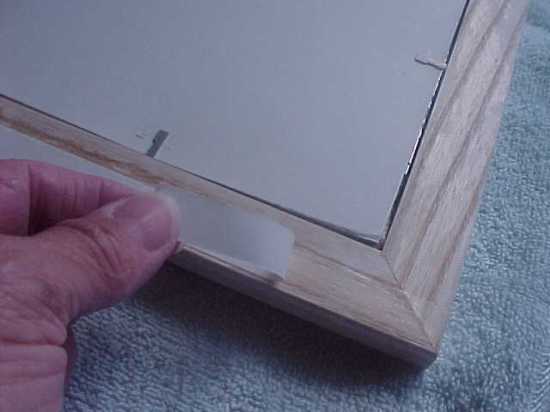
Occasionally I use “spacers” which are hollow plastic squared tubes that are placed at the edge of the rabbet in between the frame and your needlework. It’s purpose is to prevent the glass from setting directly on your needlework either because you have might have materials that stick up, like JABCO buttons, or you aren’t using mats and your needlework needs to “breathe”. I have elected not to use spacers on this piece because I’m using a double mat which provides enough breathing room. And I’m using single foamcore because the depth of my rabbet isn’t all that accomodating. I have bought foamcore from the online store listed at the bottom of the tutorial and just purchased 2 large thin pieces from my LNS at a cost of $7.50/ea. My LNS charges me just slightly more than their cost which is awfully nice of them. I purchased the glass, mats and frame from them and my bill was under $50.00, so with some time and a few materials I can have a framed piece that would cost over $100.00 for someone else to do. BTW, I just recently saw acid free foamcore at Michael’s in the art section by the poster board. The sheets are 32″ X 40″ and would be a good deal with a 40% off coupon!!
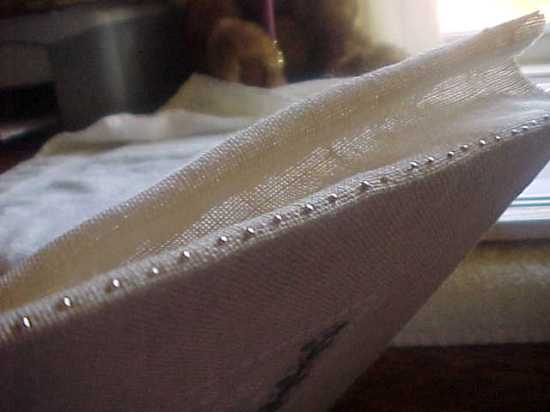
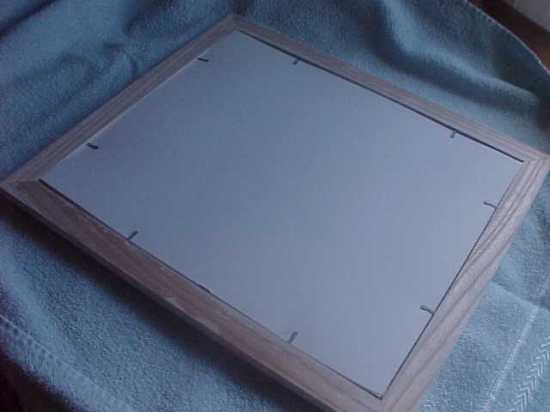
Pictured below are some of the tools needed for this framing job. Your frame, glass, mats, cleaned and pressed needlework, cutting mat, pins, ruler, pencil, scissors, assorted job cutting Xacto knives, hammer, pins, double sided tape, artist’s tape, and a point driver. Pins used in this application are NOT straight pins. Well, they are straight pins, lol, but they don’t have a head on them like regular straight pins which are kind of knobby and convex. The head on the pins we use is flat and they aren’t quite as long as a regular straight pin. They also need to be nickel plated because of the rust issue. They are available in any craft or fabric store.
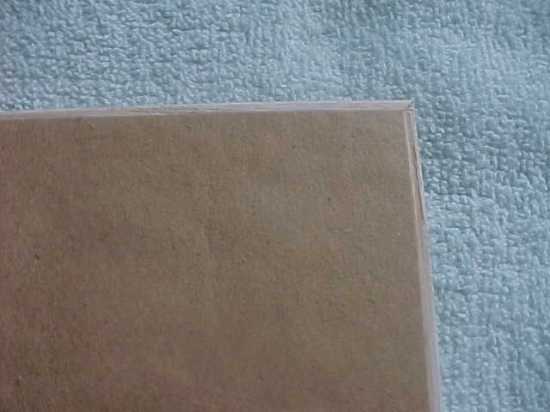
Start with a clean protected workspace, using towels or something soft and cushiony to protect your frame from scratches and to capture wayward pins. Measure the length and width of the inside of your frame and cut your foamcore approximately 1/8″ less than measured to allow for the material and pins on the edge. The foamcore is cut on my cutting mat using the gray tool marked Xacto in the tools picture above. It is made specifically for cutting foamcore and like materials. There is a small knob on the underside that loosens the blade and will allow you to move it up and down as needed for the depth of what you’re going to cut.
I really don’t have a precise scientific method for centering my needlework on my foamcore board. I kind of eyeball it and start pinning, adjusting as necessary. This is the most critical and time consuming part of the whole process. I pin, unpin, place it in the frame with the mats, measure, pin, unpin. You get the idea. You need to have the same amount of threads showing all around and your vertical and horizontal thread lines need to run parallel to the edges of your mats. Stretch as you pin, making sure that you stretch straight outwards and not to either side or you will end up with it stretching sidewickered. I place my pins about 1/4 inch apart.
All that’s left to do is attach your hanger and optional rubber bumper pads to the four corners to protect the walls.
Hope you enjoyed my tutorial!! I had fun making it.
BTW, I use www.framingsupplies.com if I can’t buy locally. Not affiliated, just a satisfied customer.
We’re Making Progress & Stash Busting
July 12, 2008 at 3:16 pm | Posted in Uncategorized | 1 CommentHere is a progress pic of my punchneedle so far. I am really enjoying this but boy, does it suck up thread!

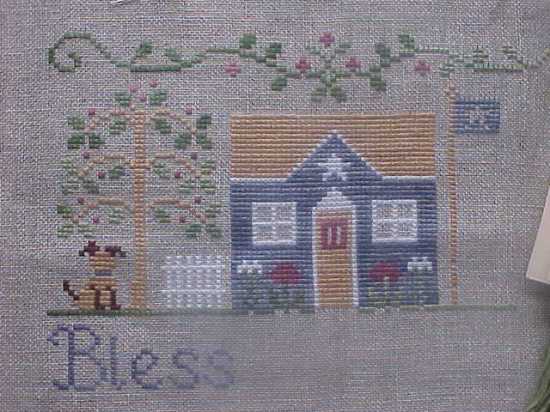
And a progress pic of Bless Our House by CCN:
I picked up the mats and frame for Gingerbread Cottage and will probably post a framing tutorial tomorrow or Monday. I ordered a frame for Shepherd’s Bush “Oh Say” and also bought Lizzie Kate’s “Housework won’t kill you but why take a chance”. The colors on this chart are NOT me, so I’ll be changing them out. Probably use a little blue in it since blue is my favorite color.
I decided to delve into the cedar chest where all my cross stitch is stashed and pulled out a couple of pieces that I’d like to do soon:

“Wish” and “Home” by Shepherd’s Bush ( I also had the fabbie and the buttons), “Snowy Morn” kit by Shepherd’s Bush and two Santas by Lizzie Kate. I completed two other LK Santas a while ago and display them every year, so I think it’ll be neat to have a display with four of them. The forage into the cedar chest was eye opening to say the least. I have four kitted Chatelaines, tons of Lavendar & Lace angels, Drawn Thead, Indigo Rose, the personalized sampler ordered through Elegant Stitch that incorporates all of the names of the family and is “yo” big, Just Nan stuff and so much more. It was almost as good as shopping at the LNS, lol. I also have threads out the wazoo – Carrie’s, Thread Gatherer, Caron, NPI and two enormous bins full of fabric that are in the hall closet. Like everyone else that’s addicted to CS, I have enough to last a lifetime.
We’re off to a birthday party tonight – hubby’s lifelong friend AND boss. He’s turning 60, so is hubby in September and don’t ask – I’m not that old yet, lol.
Carol
Bless Our Home
July 9, 2008 at 1:06 pm | Posted in Uncategorized | Leave a commentHere’s a picture of CCN’s Bless Our Home so far. I should have this completed in the next week or so. I’m a little disappointed in the Crescent Colors Peanut Brittle used for the roof, tree, and part of the doggie. It’s so much lighter than the charted picture and doesn’t have any variegation at all. I compared this skein with the skein that comes with Sweet Treats in addition to what my LNS had and they were all virtually the same. I suppose I could have changed it out, but I was so far into the roof before I even thought about it and didn’t feel like frogging. The two skeins of Pablano Pepper that I’m using (I had part of one from another design and bought another) are way different also. One is darker and more variegated, the other is very light in color and variegation!
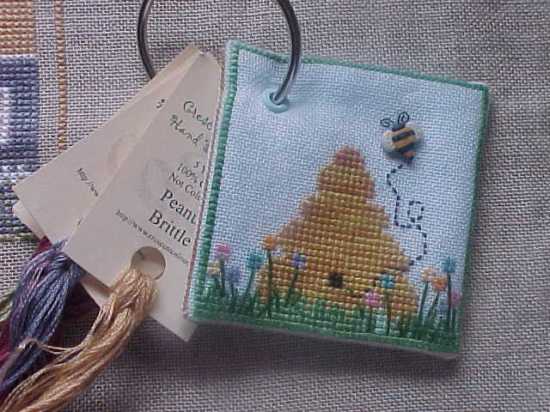
I also just realized that I haven’t posted a pic of my floss ring tag. This is a little Hobb Nobb Design. I got some washers in the mail today that I won from a lady on the Bay of Evil. That should make the back end of my eyelet look much more finished.
Just hanging out today. The contractor was over yesterday and so was dad. We’ll be building the addition on the back of the house next to the deck. The steps from the deck to the driveway will need to be relocated and I’m going to lose my living room closet because it will become the doorway to his room. The brick exterior of the house will become one of the walls of the addition, however my kitchen window is on this wall and the contractor says to just leave it. However, I’m not sure that I want to look from that window into my dad’s bedroom. I can fix that by installing a blind on the kitchen side, but what do I do about it on the bedroom side? Will that be enough or am I being anal as usual?
I just checked my CC and The Silver Needle order finally appears so I should be getting it soon. I post piccies when it comes – I got the Jill Rensel mats for Shepherd Bush’s “Oh Say” and Waxing Moons Designs Bittersweet Witchy Hat in punchneedle. My SB&B order is still pending waiting on some floss to arrive so I guess I won’t be seeing that order till next week.
I’m outta here – I need to go to the grocery store and to the library yet today. Have a blessed day!
Carol
Create a free website or blog at WordPress.com.
Entries and comments feeds.


